
This project was long overdue.
My mom gifted me a needle felting kit for my birthday, and I had set it aside for a few months. Those poor kitties were waiting to be crafted, meowing endlessly (well… not really, but it did make me feel a bit guilty) until I finally opened the package. I pulled out all of the wool roving in the felting kit, set up my felting station, and flattened out my instructions. I thought I was ready to begin, but realized very quickly that I wasn’t going to be able to just rely on the diagrams and needle-felt my way through it; I would have to translate the Japanese instructions into English.
With my trusty phone and the Google Translate App, I took photos of the text and deciphered the important parts of the instructions. Mostly, it was to clarify the measured amounts of wool roving for each cat. I wrote down some notes for myself, and soon enough, was ready to felt these adorable kitties.
The felting kit comes with enough wool for each cat, plastic eyes, wiring, and chains to make the cats into key chains. I chose to not make them into charms, but little display figures instead.
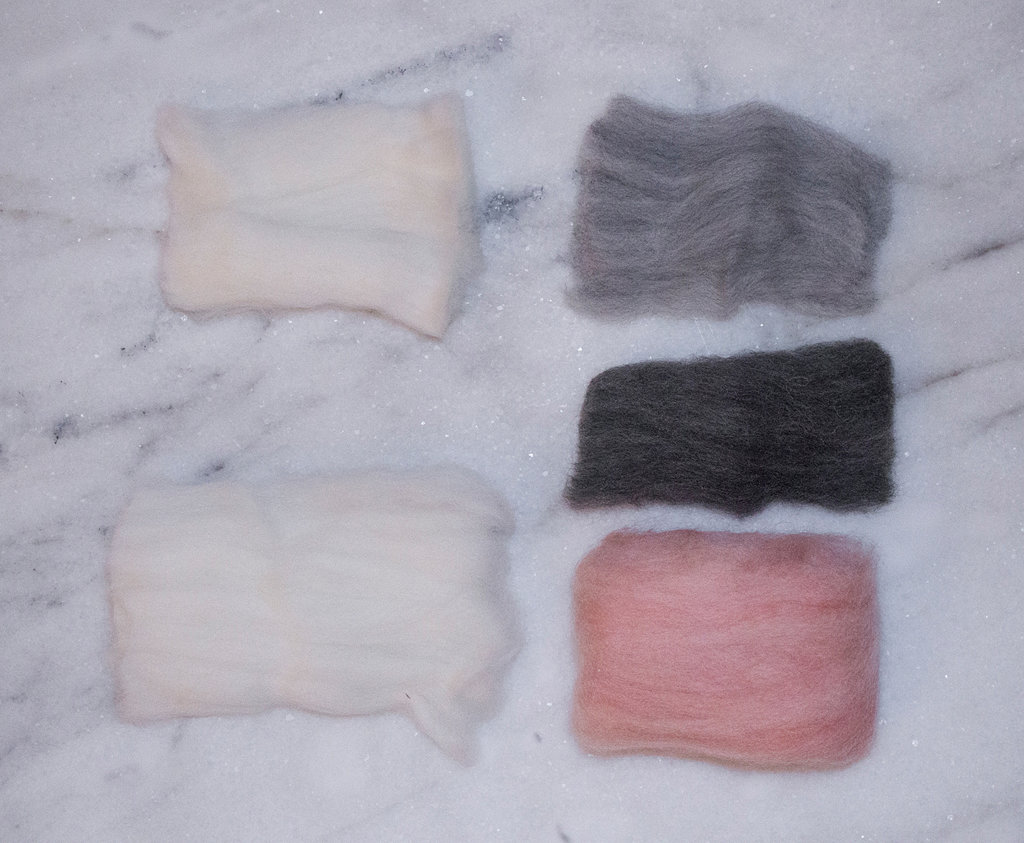
These are the colors that are used for the ‘Playful Cat’.
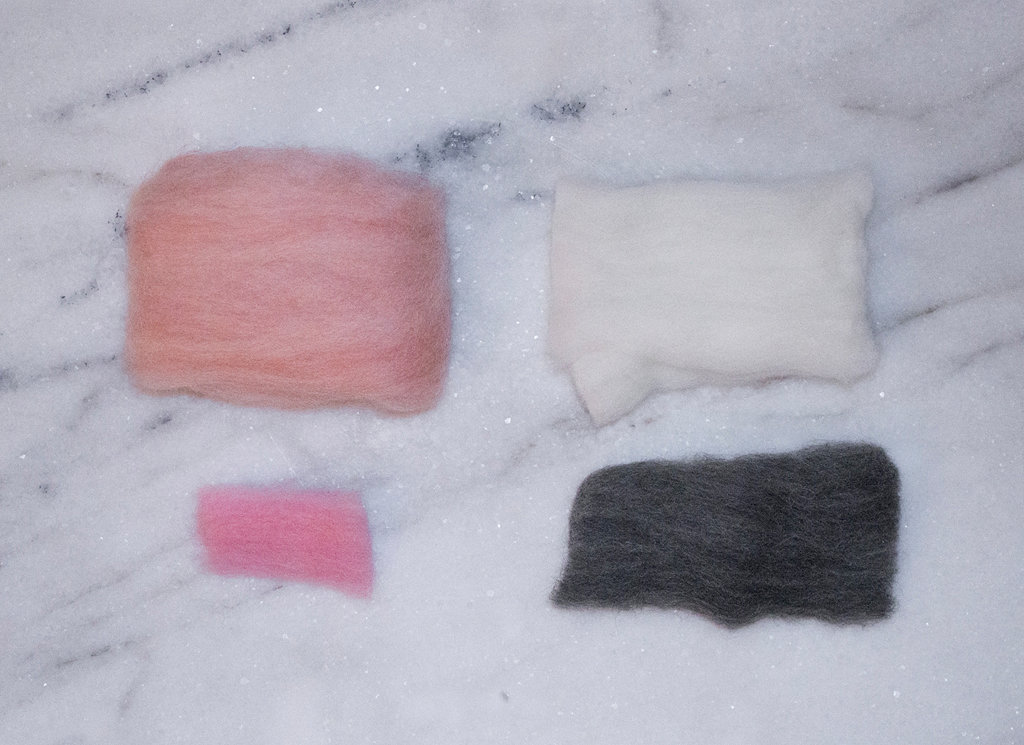
These are the colors that are used for the ‘Sitting Cat’.
This wasn’t the first time I’ve made felted friends, although, it was my first time making figures from a felting kit. Thankfully, it wasn’t difficult to figure out what components I needed to make each cat.
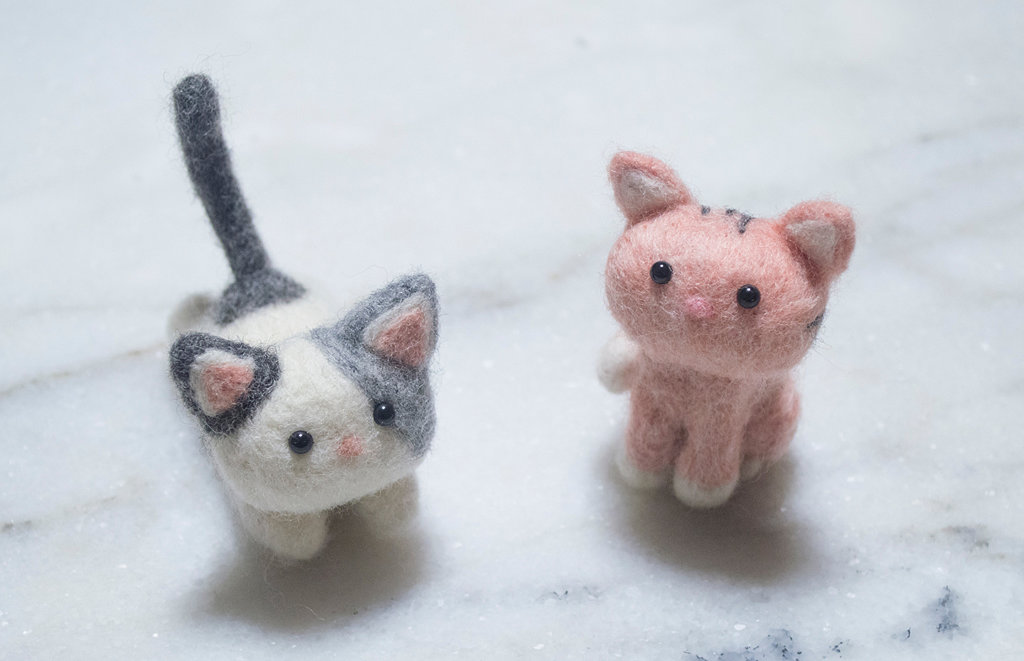
According to the instructions, the ‘Playful Cat’ (the Japanese instructions refer this cat as the ‘Lying Down Cat’) needs 15cm of white roving for the body, and 10cm of white roving for the head. For the ears: little bits of light grey, dark grey, white, and light pink wool. And finally, the tail needs to be dark grey, with a finished length of 4½cm.
The ‘Sitting Cat’ (the Japanese instructions refer this cat as the ‘Pink Cat’) uses 10cm of light pink wool for the head and 10cm for the body. The lengths for other body parts aren’t specified, but the same light pink wool is used for the legs, ears and tail, and the white for the details on the paws, inner ears, and tip of the tail. The dark grey wool is used to give the ‘Sitting Cat’ her stripes.
The ‘Playful Cat’ gets a light pink nose, and the ‘Sitting Cat’ gets a dark pink one. Both cats get two beady eyes.
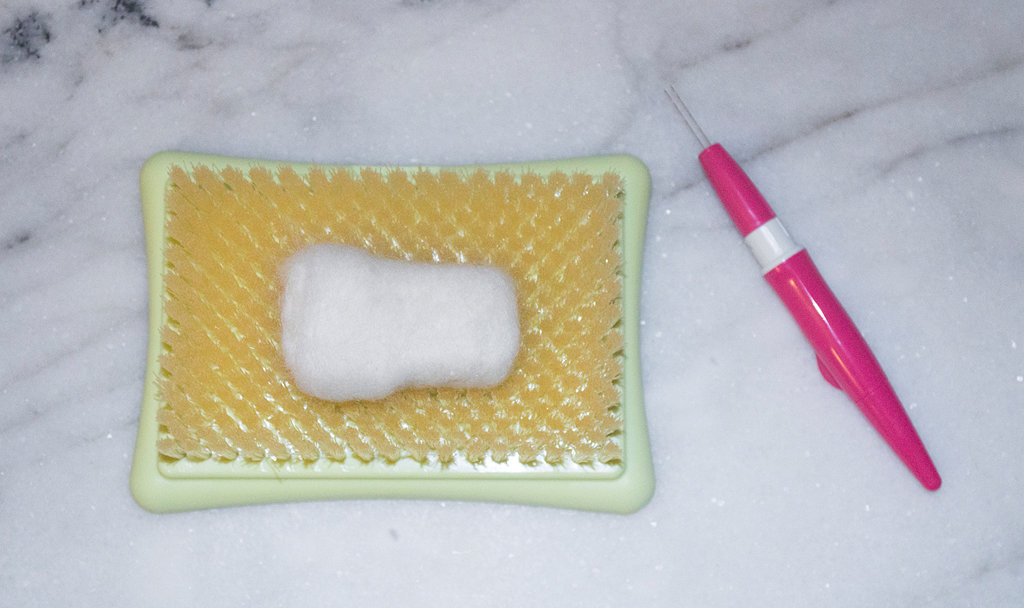
I have my felting mat and my thin needles in the felting pen. Here I am shaping the body of the ‘Playful Cat’.
The diagrams that come with the felting kit are very straightforward in how each part gets made and assembled. I found it easier to make each body part first, sans detail, then add the details in while assembling. The basic needle-felting rules apply every time you felt: felt the wool in an up-and-down motion to prevent the needle from breaking; use a felting mat to protect your project, your hands, and your needles; shape the wool as you go, keeping sections of the wool less dense until you are set on its shape; keep the joints un-felted to ease the joining of parts; and use more roving to build upon sections that are already felted.
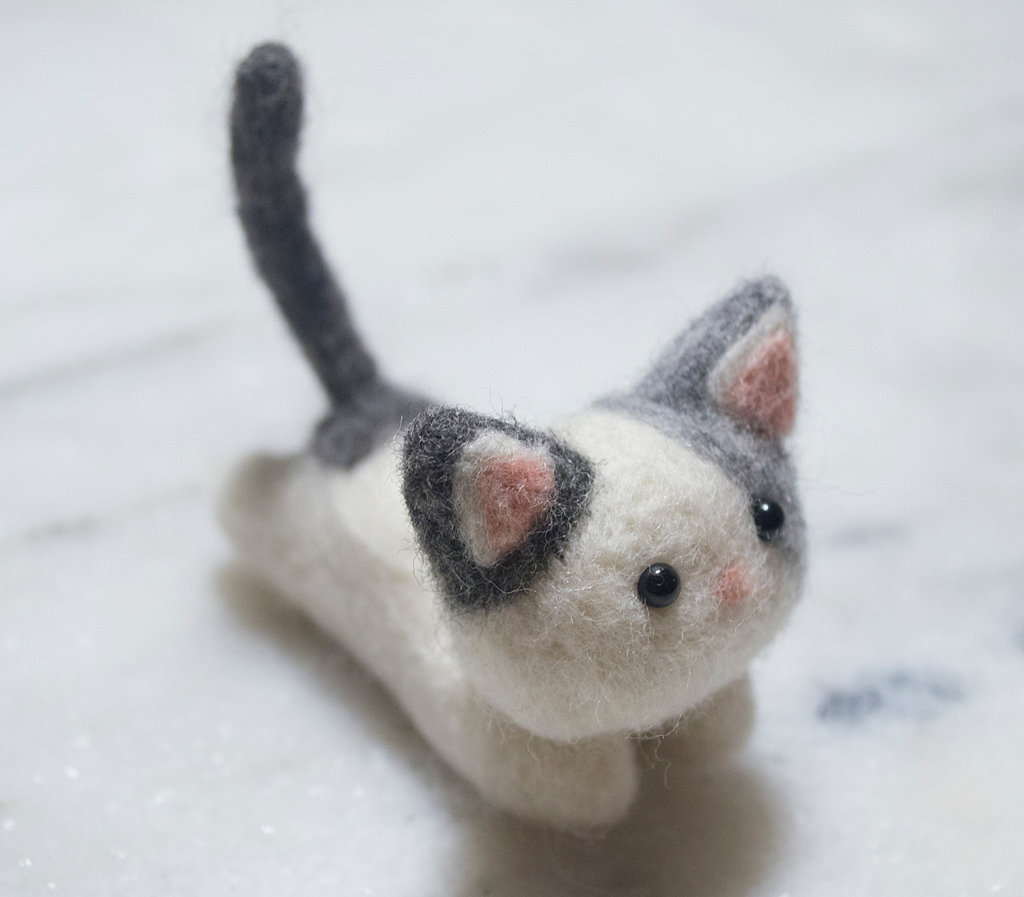
Detail of the ‘Playful Cat’.
I felted a body that measured about 6cm in length, cut 1cm notches on both ends of the rectangular body, and shaped the four legs. I kept one end of the body a bit soft to attach the head. I felted the head into a loose ball, rolled the wool in the palms of my hands, and continued to felt and shape it into an elongated ball. I then attached the head to the body, added some roving to hide the seam, and some more roving for the backside of the ‘Playful Cat’ to give it a rump.
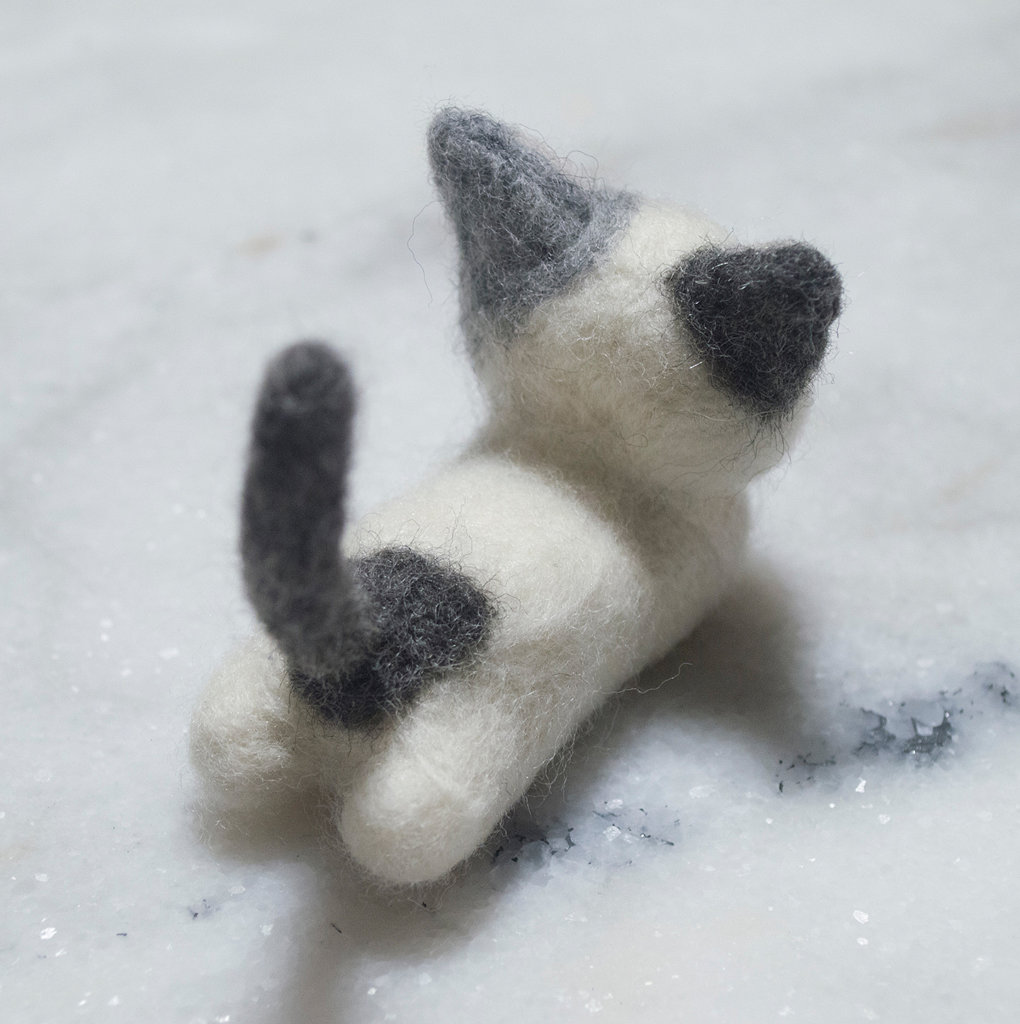
The tail of the ‘Playful Cat’.
The two ears were shaped (one light grey, one dark grey), and the details of the inner ear were added using a single needle. I remembered to keep the bottoms of the ears a bit fluffy, so I could attach them to the head. I took some light grey roving to extend the coloring down the face. The tail was shaped similarly to the head, rubbing the wool between the palms of my hands and felting into a dense tube. Once again, I kept the end a little fluffy to attach the tail to the body. I took some more dark grey wool to create a larger grey patch detail.
To finish, I took a single needle to create small holes for the eyes, and a tiny amount of light pink roving for the nose. I glued the eyes secure and moved onto the ‘Sitting Cat’.
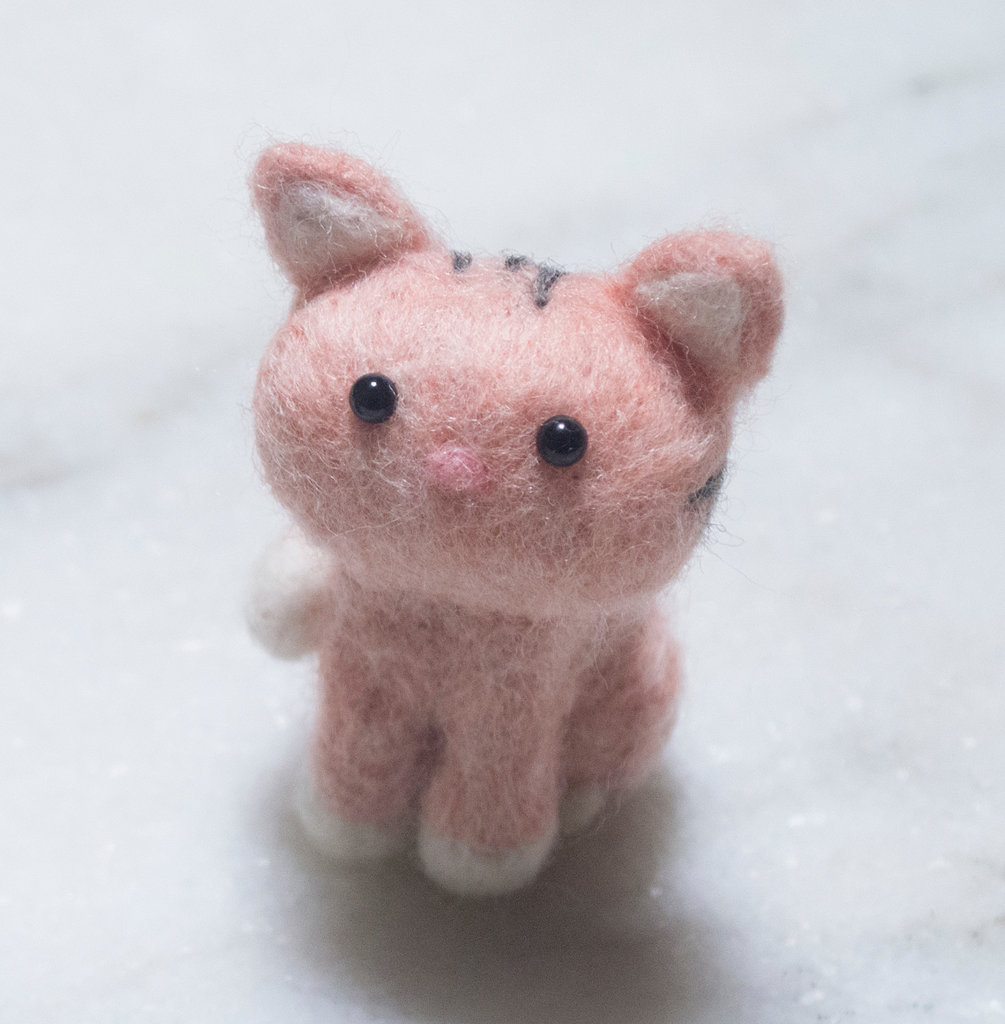
Detail of the ‘Sitting Cat’.
Both the body and head of the ‘Sitting Cat’ were shaped like the head of the ‘Playful Cat’, although the body was more like a cylinder than an elongated ball. I attached the head to the body with some wool to cover the seam, and started shaping two front legs like how I made the tail of the ‘Playful Cat’. I remembered to make the legs slightly shorter so that I could make white ‘socks’ for the cat. For the ‘socks’, I used a single needle and shaped small white balls. Using that single needle, I attached the front paws to the legs, then the legs to the body. I took some more light pink wool to secure the front legs to the body, and then contoured the legs to make them stand out. For more contouring, I added small balls of wool on the sides of the body to create hind legs, and made it look seamless by adding a thin layer of roving.
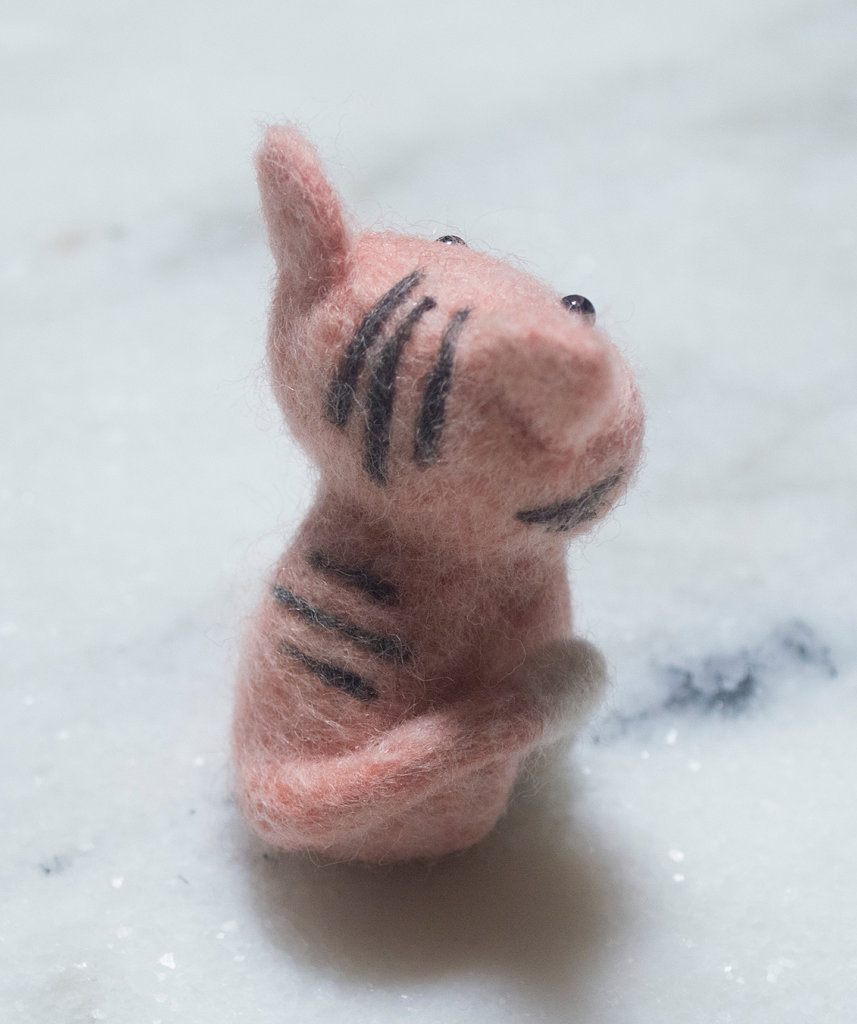
The tail and stripes of the ‘Sitting Cat’.
I made two ears, put the white detail on the ears, and attached them to the head. I fashioned a tail, took some white roving to make the white-tipped detail, and fixed it to the body. To make her tail wrap around, I used a single needle and carefully felted it in place. Like the ‘Playful Cat’, I gave her a nose and glued her two eyes. Lastly, I felted on her dark grey stripes with thin tufts of wool and a single needle.
The following morning, I felt bad (no pun intended) for my pink cat because she only had two paws showing. The instructions didn’t say anything about the back paws, but I decided to give her some anyway. I took a tiny amount of white roving, made two small balls, and felted her ‘socks’ onto her hind legs.
I know I omitted their pink cheeks and detail around the eyes, but they turned out so cute!! They are a perfect size to display on a shelf, used as a charm for a bag, or made into a key chain.
**The links below are affiliate links to the tools I use for this project. Please, feel free to browse and ask questions on anything you see listed below. If you make a purchase, it will help towards the running of Everybunny Crafts!**


