
Hey everyone! It’s been a couple of months since I made a post! I’m *so* sorry guys! I’ve been super busy revamping my food blog and getting sick with the flu (and my hubby getting sick with the flu) that I haven’t been able to type a great post. I don’t want to post anything mediocre or even something inferior than what’s in my capabilities (It’s no fun when you have to read a boring post…), so I waited until we were both healthy and things were less crazy before writing this one.
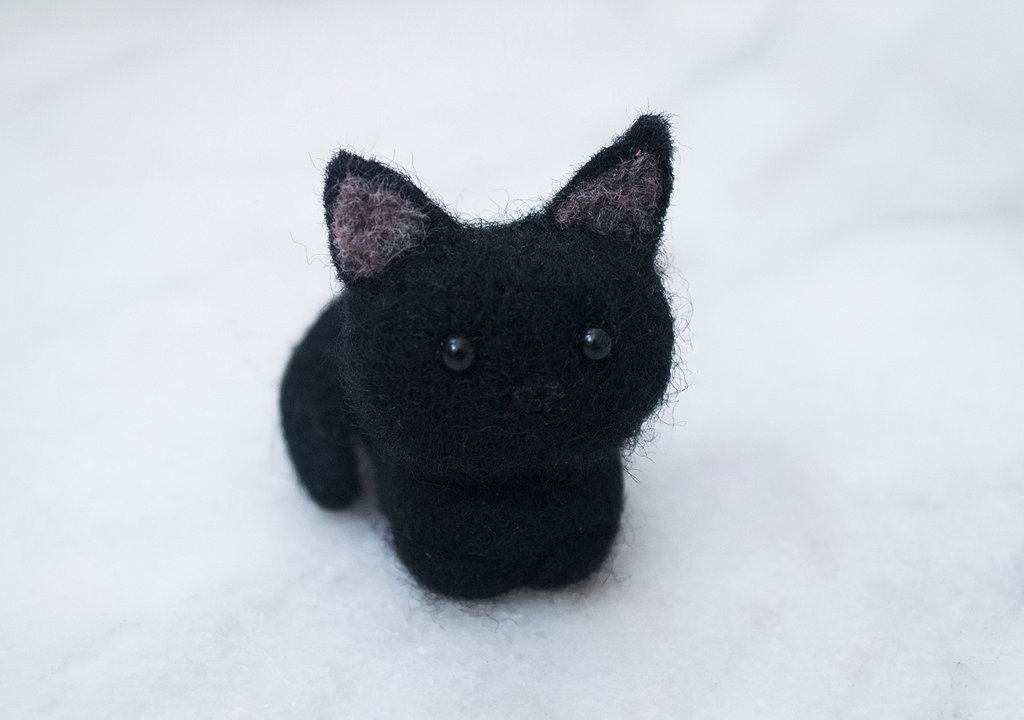
Back in April, I made this black cat for my hubby, because he loves black cats so much! I know I made the other two kitties in a previous post, but I wanted to make another cat that was separate from the felting kit. Plus, this one is a cute cat loaf!
**Check out my other felted cat tutorial for a more comprehensive look as to how a kitty is assembled and made.**
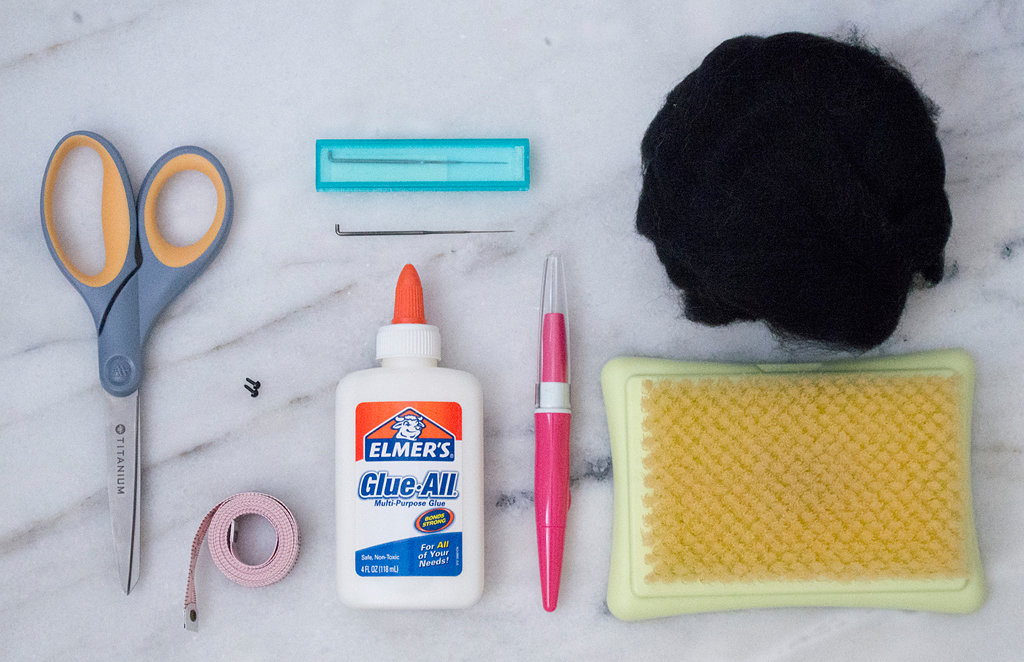
The supplies are the same as the other cat project, with the addition of speed needles; the individual needles help me felt in small and precise movements. It’s also helpful to have a pair of embroidery scissors (not pictured) or some small shears, to trim loose fibers at the end of your felting activity. I also forgot to photograph the additional pink wool roving that I used for her ears. It’s such a small amount that I completely spaced. SO SORRY.
Here is some quick information before you go full force and *kitten pounce* your way through the felting… taken from an older post:
**I found it easier to make each body part first, sans detail, then add the details in while assembling. The basic needle-felting rules apply every time you felt: felt the wool in an up-and-down motion to prevent the needle from breaking; use a felting mat to protect your project, your hands, and your needles; shape the wool as you go, keeping sections of the wool less dense until you are set on its shape; keep the joints un-felted to ease the joining of parts; and use more roving to build upon sections that are already felted.**
To begin, make an abdomen section by cutting off a 15cm length of fiber, and slowly rolling and tacking the wool with the felting pen on the felting mat. Try to maintain a squat cylindrical length of about 4-5cm while loosely felting the trunk of the black cat. Periodically, pick up the body and give it a roll between the palms of your hands, so that the fibers will felt and there will be fewer visible needle marks.
Make an oval head with 10cm of roving, using the same method as above, rolling and tacking the fibers with the felting pen and mat. Once the body and head are the right shape, secure the fibers further on each body part by felting it thoroughly. You will find that in this process, your head and body sizes may not be to your liking. That’s okay! Take a small amount of roving and build upon the existing felted wool until you are satisfied with its shape and size.
Take some more roving, enough to make two lima-bean-size hind legs. Use the speed needle to carefully felt each strip of fiber into two rounds. Take another two bits of roving to make two triangular black ears.
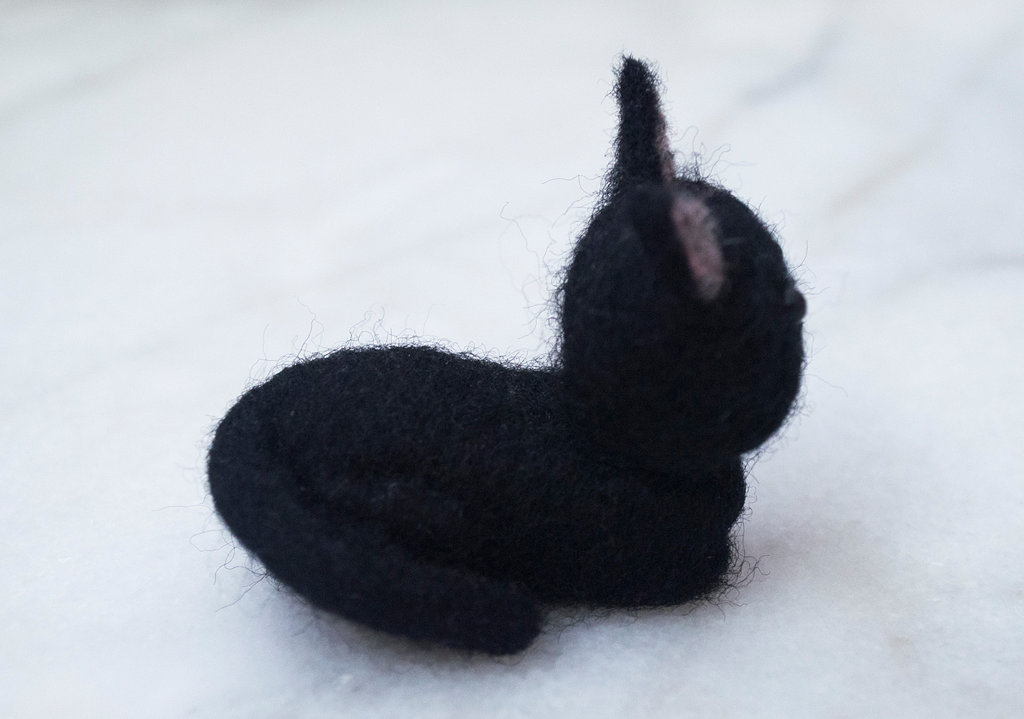
Lastly, take a length of roving, about 7-8cm, and shape it between the palms of the hands into a tube. Needle-felt the the tube into a long tail, leaving one end un-felted.
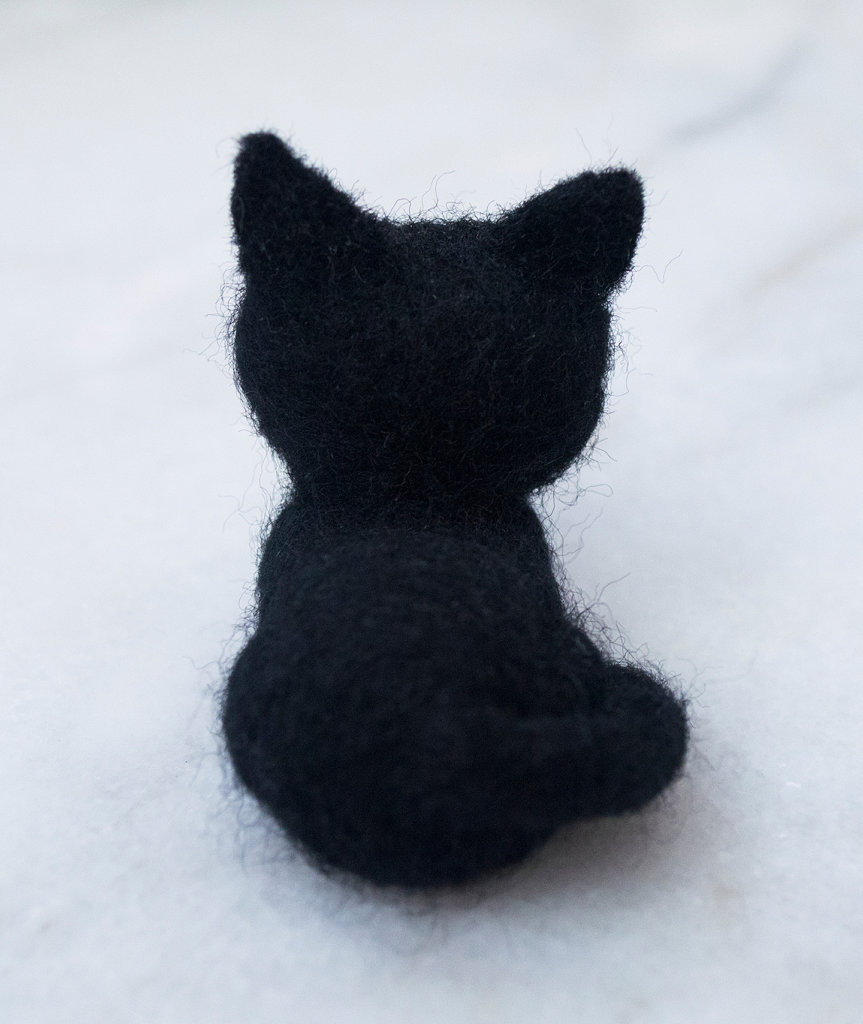
To assemble and shape: to attach the head to the body, take a short and thin length of roving and wrap it around her head and body like a scarf. Felt the fibers together, securing the two parts and hiding the seam. The hind legs are attached similarly, using a short and thin length of wool to secure the two rounds, while hiding the seams. The tail is attached to the rump using the un-felted part of the tail. Wrap the tail around her body and tack it in place using the speed needle. Add a thin amount of roving to secure the tail, if necessary.
If you want a little bit of color on your black cat, take a very small amount of pink wool roving and slowly add some pink fibers onto each ear. Taking the speed needle, attach the ears onto the head. Secure with a thin amount of roving, as necessary, hiding any noticeable seams.
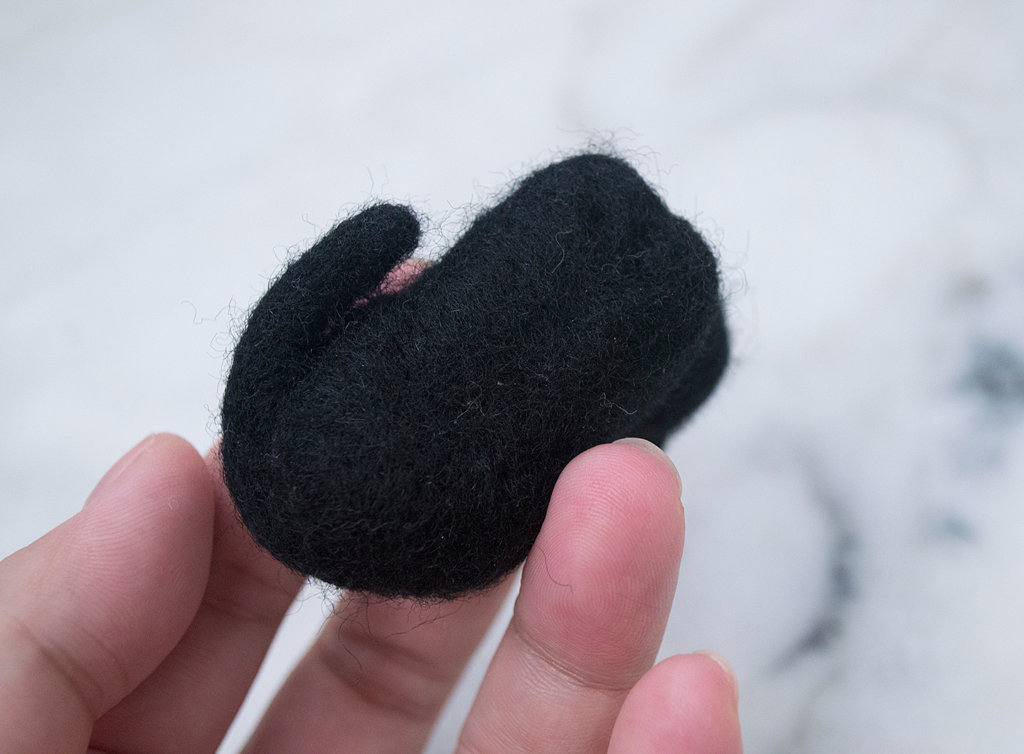
With that same single speed needle, carefully add details into the abdomen; shape the hind legs on the sides, and the front paws on the underside and front of the cat. Make small holes on the face for her eyes, and secure with a small amount of glue. Add a tiny nose with some scrap roving (a grey nose, a pink one, or a mix of a bunch of colors, like this one! *Boop!*).
After all of the shaping and re-shaping, attaching and contouring of the cat, she’s all done!
Apologies to the consistency of the photos for this post: I’ve had to lighten the photos a bit to showcase the black cat’s features better; hopefully all of you can see how cute she turned out!!
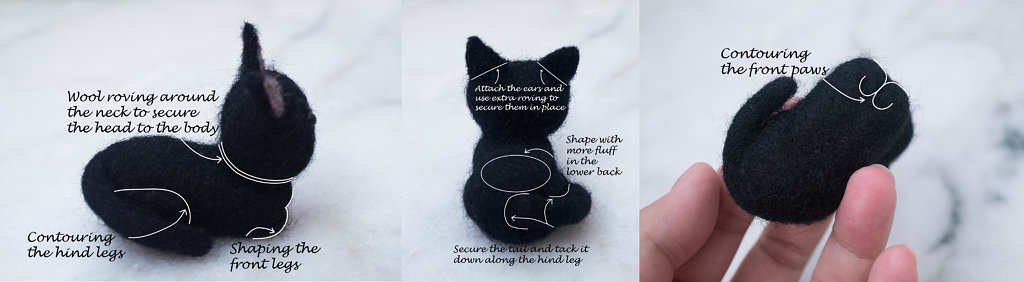
Here are some diagrams to help you make your *purrfect* cat loaf!
**The links below are affiliate links to the tools I use for this project. Please, feel free to browse and ask questions on anything you see listed below. If you make a purchase, it will help towards the running of Everybunny Crafts!**


